Install Imagick in xampp
Imagick is a PHP extension to create and modify images using the ImageMagick library. ImageMagick is a free, open-source software suite for editing and manipulating digital images. It supports many file formats, including JPEG, PNG, GIF, TIFF, HEIC, and more, and is used in various industries like web development, graphic design, and video editing. So Imagick is an extension that enables PHP applications to utilize the ImageMagick library's capabilities for creating, editing, and modifying images.
So, if you want to use Imagick in your PHP projects, you need to install two thin
ImageMagick: This is the main software that deals with image manipulation. It's like the engine that does all the work behind the scenes.
Imagick PHP extension: This is a connector that allows your PHP code to talk to and control ImageMagick, letting you use its features in your web projects.
Follow the provided step-by-step guide to install Imagick on XAMPP:
Step 1: Checking system compatibility
Ensuring system compatibility is crucial because without it you won't be able to download the correct version of ImageMagick or the Imagick extension.
Checking system compatibility for Imagick involves several steps, primarily focused on ensuring your environment meets the requirements for both ImageMagick and the Imagick PHP extension.
Here's a general checklist to guide you through the process:
PHP Version
- Open Command Prompt (Windows) or Terminal (macOS/Linux).
- Type php -v and press Enter. Note down the PHP version.

Thread Safety
Check if your PHP installation is thread-safe (TS) or non-thread-safe (NTS). This is particularly relevant for Windows systems.
You can find this using CMD.
- Open Command Prompt (Windows) or Terminal (macOS/Linux).
- Type php -i and press Enter.
- Look for "Thread Safety". If it is enabled, you need a thread-safe (TS) version of Imagick.

System Architecture
Determine whether your system is 32-bit (x86) or 64-bit (x64). This affects which version of ImageMagick and the Imagick extension you should download.
Step 2: Download and Install ImageMagick
- Go to this link and download ImageMagick
- Link:https://imagemagick.org/script/..

- Once the download is complete, navigate to the directory where the file was downloaded. And now double-click on the downloaded file to run the installer.
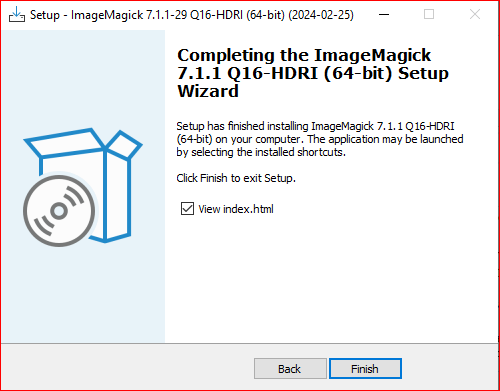
- Click all the next buttons until finish and install all default settings of ImageMagick. Or follow the given screenshots to install it.


- After the installation is complete, you can verify that ImageMagick has been installed correctly by opening a command prompt.
- Open CMD and type magick --version and press Enter. This command should display the version of ImageMagick installed on your system.

If the magick command is not recognized in the command prompt after installation, you may need to manually add the ImageMagick installation directory to your system's PATH environment variable.
To do this
- Open the Environment Variables dialog and then click "Environment Variables".
- Under the Environment Variables, locate the "Path" variable under "System variables" and select it, then click "Edit".
- If the ImageMagick path is not available here then click on the new button and add the path to the ImageMagick installation directory (typically C:\Program Files\ImageMagick-X.Y.Z\) to the list of paths, separated by semicolons.
- Click "OK" to save the changes and close all the open dialogs.
- That's it! ImageMagick should now be installed and ready to use on your Windows system. You can now use ImageMagick commands in the command prompt or integrate them into your scripts as needed.


Step 3: Download Imagick
- Go to this link and click on the DLL of the latest stable version of Imagick.
- Link: https://pecl.php.net/package/imagick
- After clicking this link you will be redirected to the download page.
- Now download the image according to the PHP version that is installed in your system, the architecture of your system, and the thread level of your php.
- My system has php 8.1, x64 architecture, and Thread safe so I download 8.1 Thread safe x64.


- Once the download is complete, navigate to the directory where the file was downloaded. And extract this file.
- Now find and copy the php_imagick.dll file and paste it to the C:\xampp\php\ext folder.
- After this copy all files with the prefix CORE_* and suffix .dll and prefix IM_MOD_* and suffix .dll and paste to C:\xampp\apache\bin folder.


Step 4: Enable Imagick in the PHP.INI file
- Open your xampp server and then click on config\php.ini file.
- Here add the php_imagick extension
- Now Save the php.ini file and restart XAMPP to apply the changes you made to the php.ini file.


Step 5: Check Installation
- To check that ImageMagick is installed, you can type magick -version at the command prompt. If you see a message telling you the version, then you know it is installed.

- To check that Imagick is installed, use the php -i and look for the heading Imagick. If you find this heading followed by a table telling you information such as the version, supported classes, and image formats, then it is installed.

By following these detailed steps, you should have a fully functioning Imagick installation in your XAMPP environment. This setup allows you to use the powerful image manipulation capabilities of Imagick in your PHP applications.